 When you see someone vacuuming ‘effortlessly’, you may think that it’s just a walk in the park. Our house used to be clean, dust-free almost all the time. Personally, I thought it was the easiest of tasks every time I saw my mum vacuum our apartment when I was younger. That’s until I moved out and got my own small place. I’ve always thought how to vacuum correctly just comes naturally to humans. Haha!
I got a Shark vacuum from the local store to help me keep my place free of dust, debris, and allergens. However, I would always find dust shortly after a ‘rigorous’ job. Then it hit me – vacuum cleaning is neither easy nor a talent. You have to take your time to learn how to do it properly.
And I’m sure you are here because you are like me. You think it is easy, but experience has taught you otherwise. So, today, we are going to walk together through this. I’ll be pointing out exactly what you need to do and what to avoid in order to perfect your skills.
So, how do you know that your skills aren’t up to speed?
Every doctor needs to know the symptoms before they can diagnose a patient properly. Likewise, if you want to get your home sparkling clean when vacuuming, you need to know your shortcomings. It’s important to know what to look out for in your house to conclude that the job is not being done well.
First of all, most people buy vacuums primarily to get rid of dust. However, most vacuums are versatile enough to help you get rid of larger particles and even allergens. This is especially crucial if any family member suffers from allergies. Same goes for a home that also has frequent visitors. So, if you find that even after vacuuming the house is still dusty, there’s a problem.
If you or a loved one has allergies that don’t ease up even after vacuuming, probably the job wasn’t done right. Also, you expect the overall smell to be better after a vacuum cleaning. If your house does not smell fresher, that’s a clear indication that you need to up your game.
There are also other pointers that you haven’t vacuumed your house well. For example, if the soles of your feet or your socks get dirty when walking from room to room, or there’s dust/dirt underneath furniture, you need to do more. Also, if you notice that your carpet has dark spots especially just next to furniture, it means that not all dirt has been cleared.

If you know exactly what to do, then you won’t have a lot to worry about. So, how can you ensure that you vacuum your house properly? Read the next section for more…
How to Vacuum your Home Correctly & Mistakes to Avoid
Part 1: Preparing to vacuum
Before you start vacuuming, there are a few things you need to do:
a) Get large items off the floor
Before you do anything else, ensure that you pick up any large items lying around on the floor. These include shoes, toys, pens, extension sockets, and any other item that may have fallen off the usual location. Some of these items like pens may damage the vacuum if sucked in.
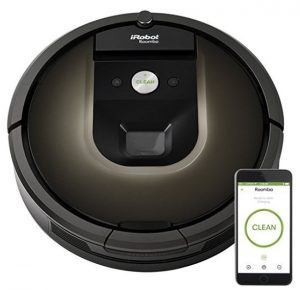
Also, if you have light furniture, move it once in a while so that you can vacuum that area well. You can move the larger furniture after a considerably longer time. However, if you have bought a robot vacuum, you may not need to move furniture around. This is because these little gadgets can even go under your seats comfortably and get the job done.
b) Dusting is key
It makes no sense to vacuum before dusting. This would mean that you probably have to get back to vacuuming earlier than planned. If you dust after vacuuming, all the dust from the furniture will land on the floor/carpet.
The right process is to dust before you start vacuuming. First, beat your curtains with a piece of cloth (or shake them). Then, wait for some time for the dust to settle. After that, dust the furniture using a damp cloth. If you are lucky to have a good vacuum, it probably has a dusting brush as part of the accessories. This should help you dust the furniture easily.
c) Check the vacuum cleaner
Before you get to work, it is advisable to ensure that the vacuum doesn’t have any defects. Most importantly, check that the dirt cup or dirt bag is empty. If it has any dirt, please empty it into the trash before you start. This will help save time by reducing the number of times you have to pause.
Another thing to check is that there is no debris or human/pet hair in the brush. If there is any, simply remove it before vacuuming to get top performance from the vacuum. To avoid having to go through this step every time, I usually clean my vacuum immediately after and then put it in a tidy, secure storage area.
Part 2: When vacuuming
After proper preparation, this is how you will get the job done to near perfection:
a) Start with the room’s edges
Among the most neglected areas in any room are the edges. As a result, dust and dirt accumulate over a long period, making it nearly impossible to clean the edges perfectly any more. Also, this renders to carpet edges closer to the walls nearly impossible to clean afterward.
With most vacuums, this should not be an issue. Your vacuum most probably has a crevice tool. This is ideal for cleaning the edges of the room, even if the floor is made of hardwood. So, there is no need to leave dust and any other dirt at the base of your walls or next to furniture that is difficult to move around.
I do this every week since I live in a generally dusty area. However, even if you don’t live in a dusty area, ensure that you use the crevice tool to clean the rooms’ edges at least once every two weeks.
b) Vacuum underneath furniture
A lot of dust/dirt tends to hide under raised furniture. After you finish cleaning the room’s edges, this is the next area to target. If you are using a conventional vacuum, remove the crevice tool and use the floor tool to get dirt under the couch, bookshelves and any other raised piece of furniture.
As pointed out earlier in this article, this task is quite easy if you have a robot vacuum. Due to its compactness, a robotic vacuum can comfortably get under furniture and suck in any dirt that has settled there over time.
This should be done at least once a month, but if you live in a dusty area, you can vacuum under your furniture twice a month.
c) Adjust the vacuum’s height accordingly
Vacuums clean efficiently if the right height is set to match the surface type. While some vacuums automatically detect the floor type and adjust accordingly, others don’t. So, if yours is not automatic in this aspect, you have to do it manually.
As you move from the carpet to the rug to hardwood or tiled floor, ensure that you make the proper adjustment for maximum efficiency. However, it is good to note that some vacuums are inclined towards specific types of floor. For example, there are some vacuums that are great for hardwood floors, while others are perfect for carpets. Also, some are versatile and can work on any kind of surface.
d) Vacuum in both directions
A lot of dirt is often trapped in carpet fibers. Since the fibers are usually twisted, dirt/dust is hidden all around. This means that vacuuming in one direction only does half the job. For you to get all the dirt out, vacuum in both directions. If you’re vacuuming towards the North, also vacuum towards the South. Repeat the same for East and West to do a comprehensive job.
e) Don’t let the dirt bag or dirt cup fill up completely
Waiting until the dirt bag or dirt cup fills up to the brim reduces efficiency. It is advisable to empty the dirt cup or bag once it gets to about 50 percent capacity for maximum efficiency (see these tips). If your vacuum is bagless, simply empty the dirt cup and continue. If yours is a bagged vacuum, you may need to replace the bag with a new one for the best performance.
Here is a tutorial on how to empty a dirt cup by Hoover (specifically the Hoover WindTunnel 3 Pro Pet Bagless Upright UH70930):
f) Vacuum slowly
I understand sometimes you may be in a hurry or you may have too much ground to cover. However, we need to focus on quality and not quantity. Even if your vacuum has a very high suction power, please give it a bit of time so that it gets rid of all dirt.
As the vacuum moves slowly over the carpet, for example, its brush agitates the carpet fibers and then gets rid of any extra dirt that is hidden. If you do this every time you set out to vacuum, you are prolonging the life of your flooring and consequently saving money big time.
g) Don’t wait for too long
Lastly, most people will wait until they can actually see dirt before vacuuming. However, there may be dust under furniture or in the carpet fibers. You need to check out for the signs mentioned at the start of the article. Follow a strict vacuum cleaning schedule if possible.
In the same breath, you don’t have to wait until you see that the floor or the carpet is dirty. By that time, there is much more that cannot be seen with the naked eye. So, it is prudent to prepare a vacuuming schedule and stick to it with a lot of discipline. This will ensure that the room is always fresh, free of dust and allergens.
Conclusion
Even if you mop your house, vacuum cleaning goes the extra mile by ensuring that dust and allergens have no space in your home. However, it is always great to know exactly how to do it effectively. Our tips on how to vacuum correctly will help you up the game in this respect. Remember to empty your vacuum regularly too.
In summary, this is how to vacuum your home correctly:
- Get large items off the floor
- Dusting is key
- Check the vacuum cleaner
- Start with the room’s edges
- Vacuum underneath furniture
- Adjust the vacuum’s height accordingly
- Vacuum in both directions
- Don’t let the dirt bag or dirt cup fill up completely
- Vacuum slowly
- Don’t wait for too long
If you have any feedback or any more tips you have implemented successfully, feel free to share with other readers at the comments section below.